Your cart (0)
Your cart is empty
Tax included and shipping calculated at checkout
Drawer menu
Tax included and shipping calculated at checkout
The Model Preprocessing node lets you remove attachments, repair the model, and calibrate the model.
Model Preprocessing - Views
STEP1 - Remove Attachments: attachment locations are auto-detected, and you may also manually select areas, then click Confirm Remove Attachments.
Model Preprocessing - Remove Attachments
STEP2 - Model Repair: locally raise, lower, fill, smooth, trim, and fill holes on the model.
Model Preprocessing - Repair
STEP3 - Model Calibration: adjust occlusal plane angles and occlusion for the whole arch or mandible only. 
Model Preprocessing - Calibration
The Segmentation node helps you segment teeth and adjust tooth numbers.
Segmentation
The Initial Position node helps you adjust tooth axes and landmarks and offers tools such as Crown-Root View, Distance Measurement, Bolton, Crowding, Symmetry, Overbite/Overjet analysis and Bite-jumping editing.
Initial Position - Views
Initial Position - Crown-Root View

Initial Position - Bite-jumping
Initial Position - Analysis Tools
Initial Position - Adjust
The Treatment Plan node contains AI-generated treatment proposals and supports manual edits; changes will affect downstream nodes. It includes Basic Treatment Plan and Expected Treatment Outcome.
Treatment Plan - Basic
Treatment Plan - Expected Outcome
The Final Position node helps you view, analyze, and adjust AI tooth-arrangement results.
Final Position - Views
Final Position - Auxiliary Tools
If you modified the model in Model Preprocessing, Segmentation, or Initial Position, please click Reanalyze at the bottom of the page; otherwise the crown-root view will not update automatically.
Final Position - Analysis Tools
PART 1 - Tooth Movement:
Adjust Final Position - Tooth Movement
Configuration: Tooth Adjustment Options can enable auto adjacent teeth movement and arch-curve matching. IPR Configuration controls whether anterior or posterior movement is prioritized when adjusting IPR/space. Mesial/Distal movement along arch curve and Tooth coordinate system options are available — using the final-position tooth coordinate system is recommended for movement calculations.
Adjust Final Position - Configs
PART 2 - Arch Curve: drag anchor points on the arch curve to manually adjust, or use Adjust Arch Shape to set Square-Round, Oval, or Sharp-Round profiles.
Adjust Final Position - Arch Curve
The Staging node helps you view and edit the AI automatic staging plan. It also provides editors for Bite-jumping, Overcorrection, and Passive Appliances.
Staging - Views
1.AI Preferences (quick edit, recommended for clinicians): By adjusting the Maximum Correction per Step, you can set the movement threshold for each stage of treatment. Once edited and submitted, the AI algorithm will ensure that tooth movement in the newly generated staging sequence does not exceed this predefined limit.
Staging - AI Preferences
Set the default per-step maximum movement under Profile → Account Settings → Preferences. New cases will apply this default when generating staging.
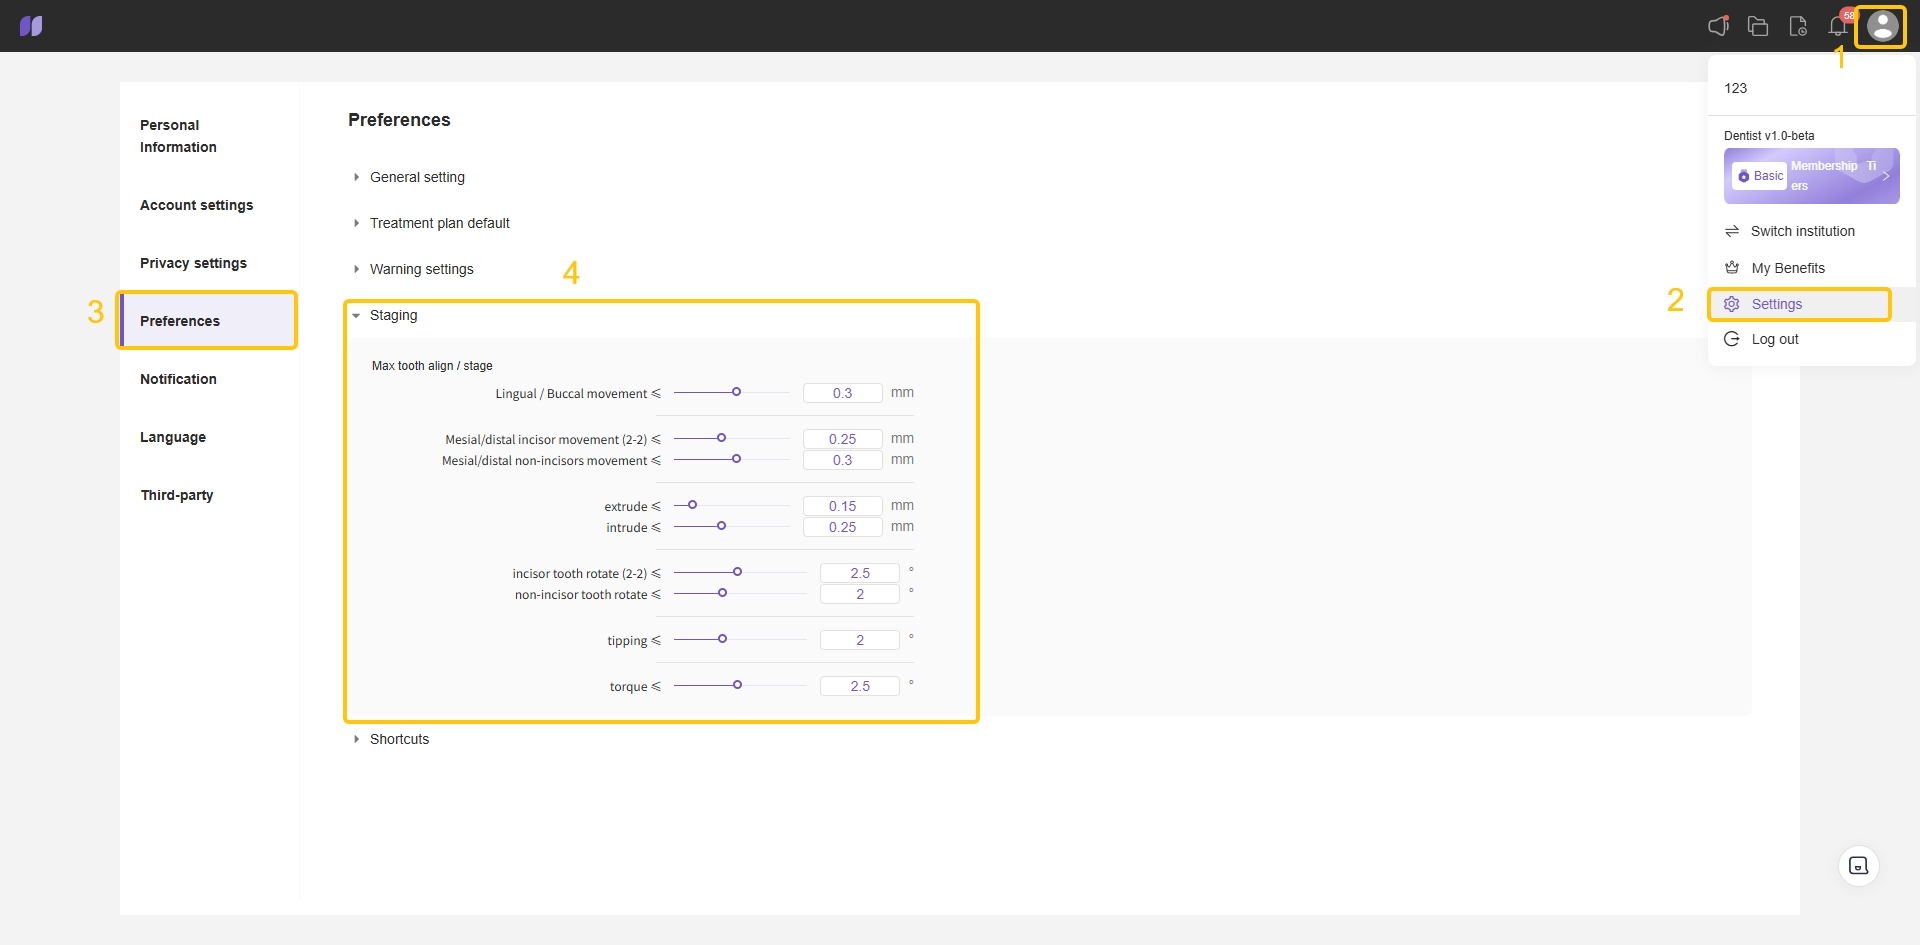
Preferences - Staging
2. Manual Staging Adjustments (powerful; recommended for technicians): the staging navigation left panel shows movement/rotation types; top-right lets you set the normal treatment maximum steps. Drag keyframes to edit tooth movement steps; select a tooth and edit movement amounts via numeric fields.
Staging - Manual Adjustments
Keyframe Operations
1. Right-click a keyframe to open the context menu and copy or delete the current keyframe.
Keyframe - Copy & Delete
2. Deleting a custom keyframe will undo the corresponding tooth movement; undoing a tooth movement will remove its custom keyframe. Undo shortcut: Ctrl+Z.
Keyframe - Undo
3. Hold Ctrl to multi-select keyframes, or hold Alt to box-select, then drag to move in bulk.
Keyframe - Multi-select & Box-select
4. Right-click empty space to create a new keyframe.
Keyframe - Add
Keyframe Direction Sequences To inspect movement/rotation directions, select the desired direction type on the left. Click a tooth sequence dropdown to show six direction components.
Keyframe - Direction Sequence
Keyframe Sequence Speed To view tooth movement speed at each stage, first click the Reset to Linear Interpolation Plan button on the left. Then hold the Ctrl key and select the keyframes at both ends of the sequence; the system will automatically display the tooth movement speed in six directions within that sequence.
Keyframe - Sequence Speed
Examples
1. Slow down a tooth movement
Example - Slow Tooth Movement
2. Speed up a tooth movement and end earlier
Example - Speed Up Tooth Movement
3. Pause a tooth movement for a few steps then resume
Example - Pause & Resume
Editors:
Staging - Bite-jumping
Staging - Overcorrection

Staging - Add Passive Appliance
The Attachments node helps you check automatic attachments and add pontics.
Attachments - Views
Attachments - Adjust
Attachments - Adjust

Attachments - Pontics
Attachments - Domes
1. Keyboard Shortcuts: shortcuts for Tooth Movement controls, View & Display, Animation & Timeline, and Basic Operations. Custom shortcuts supported and there is a one-click reset to defaults.
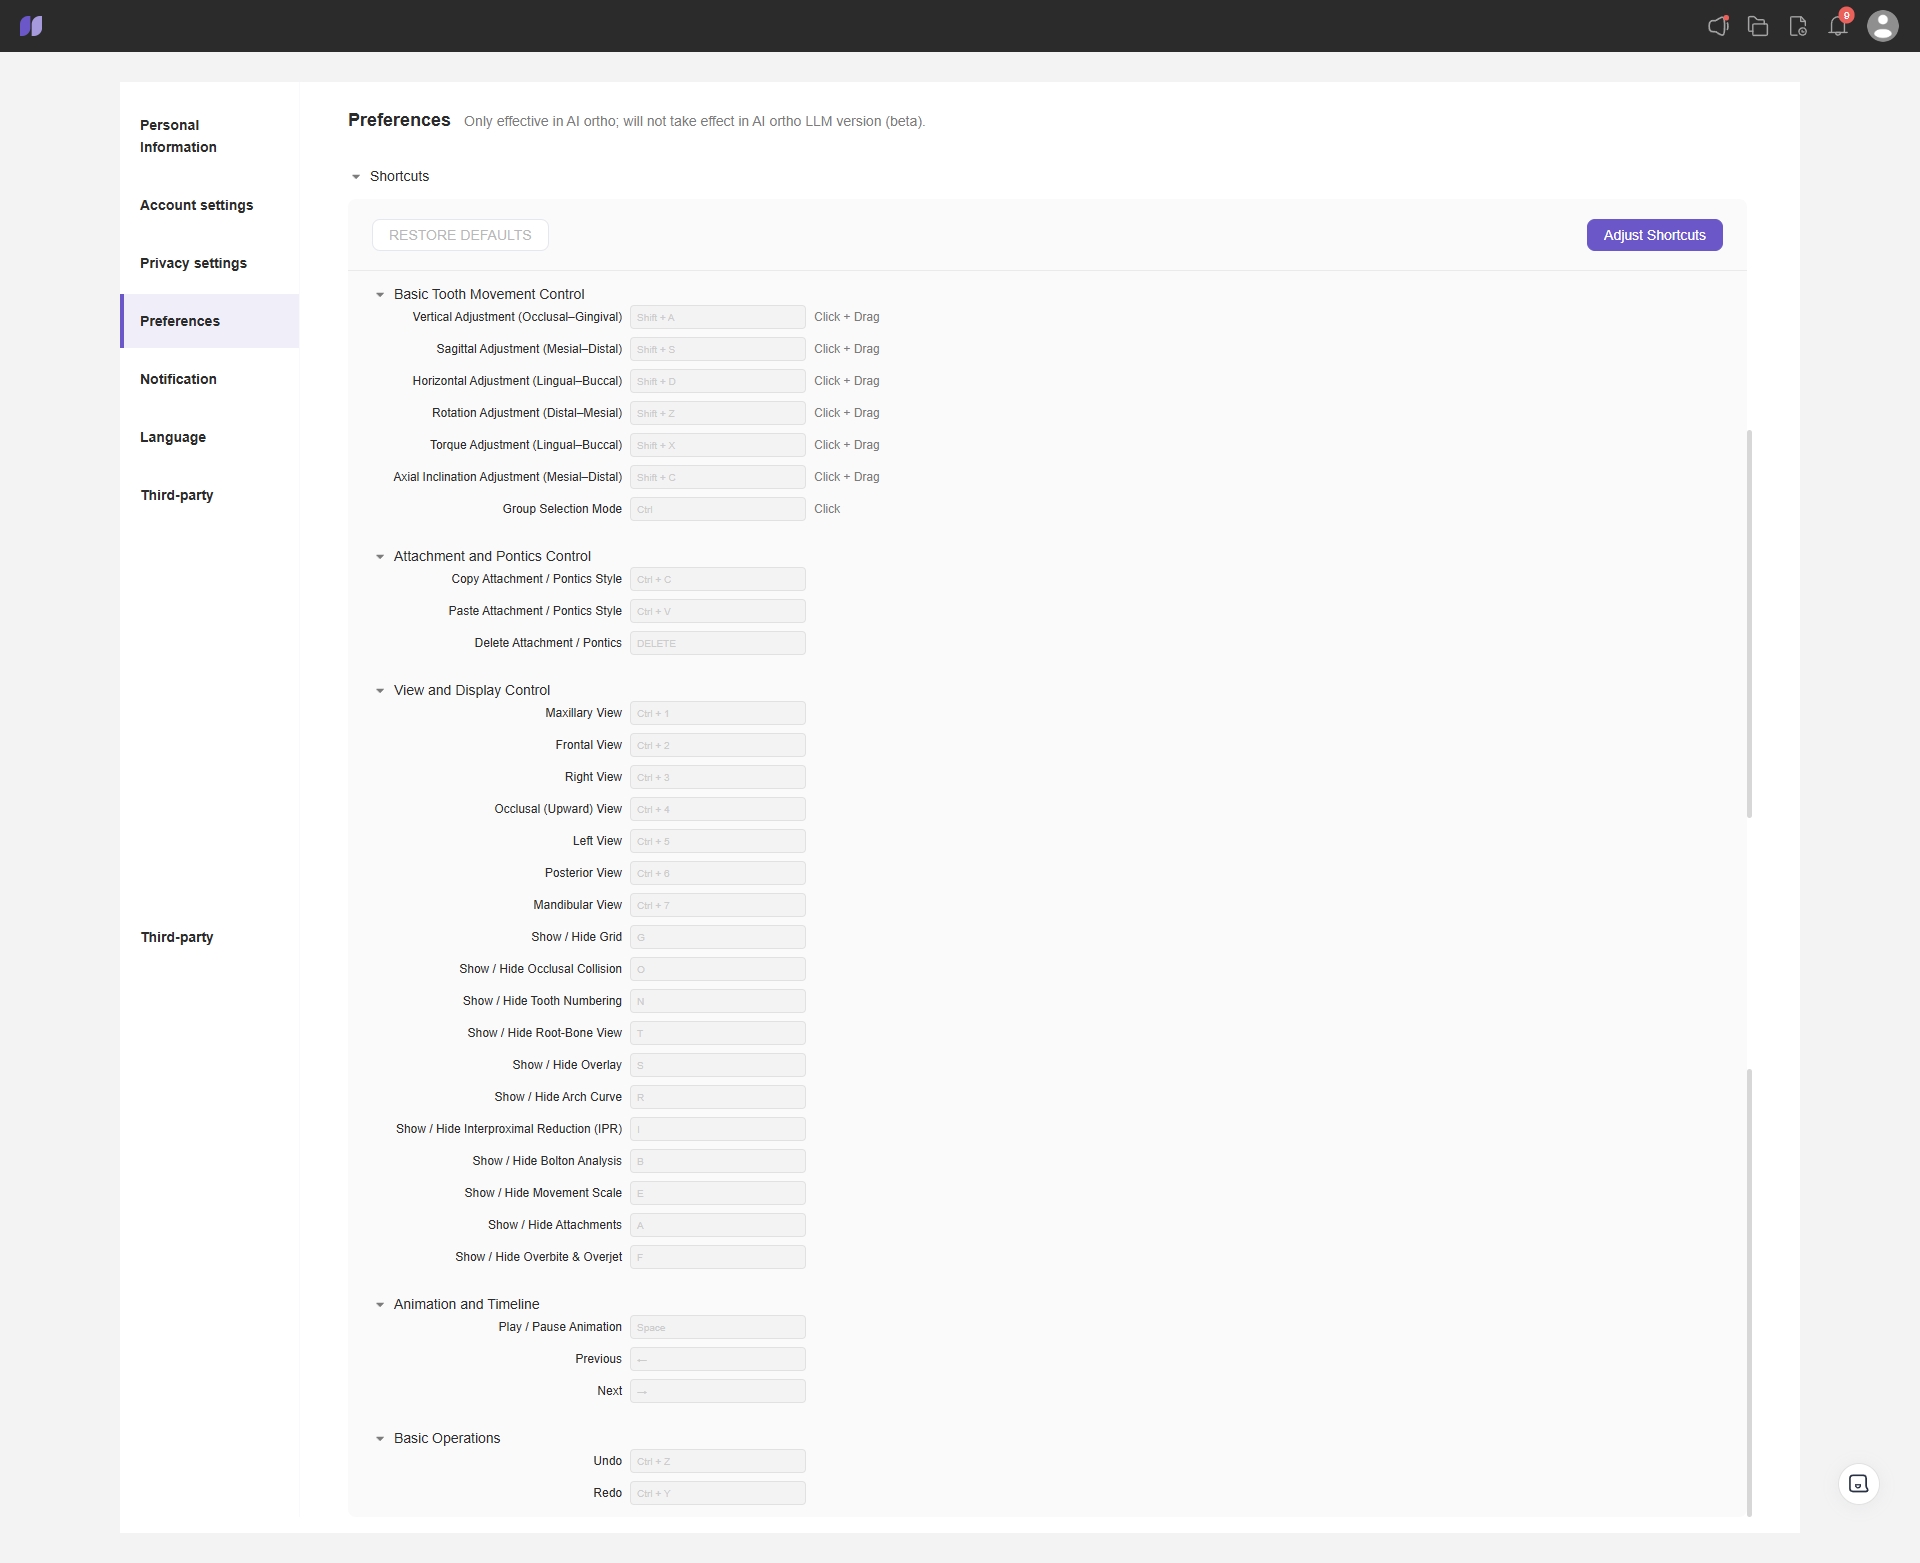
Preferences - Shortcuts
2. Treatment Plan Info sidebar:
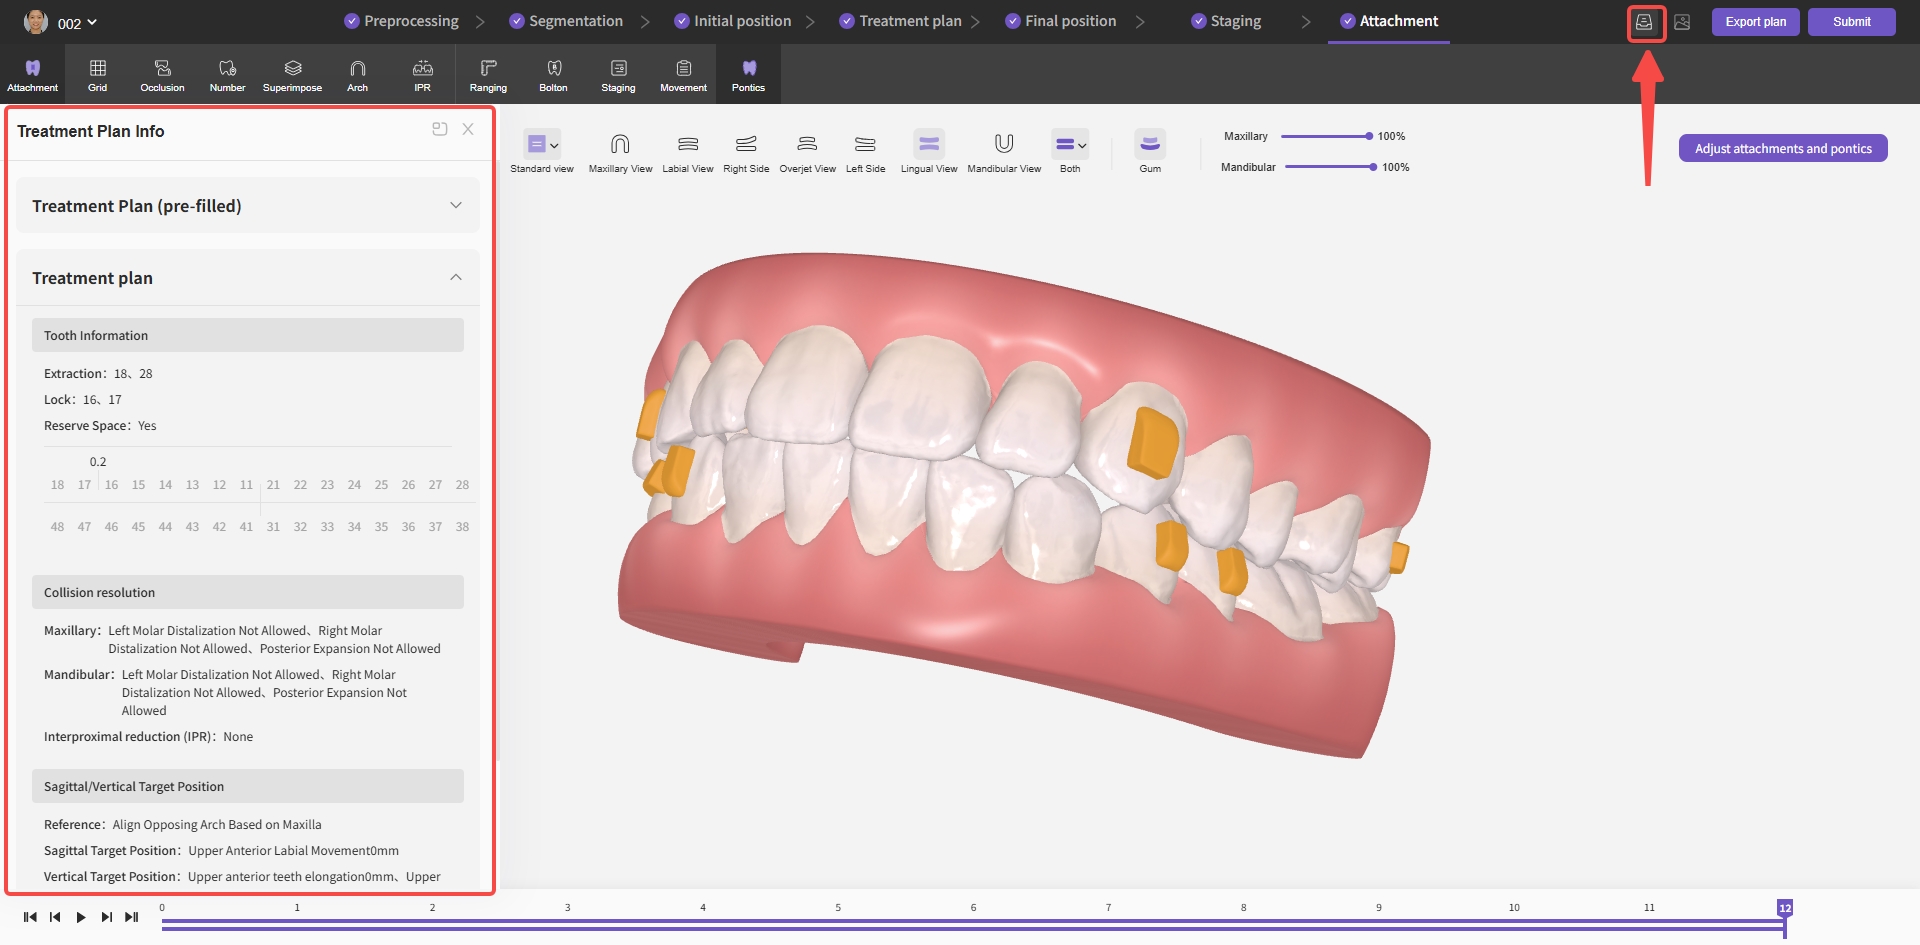
Treatment Plan Info Sidebar
3. Photo Info sidebar:
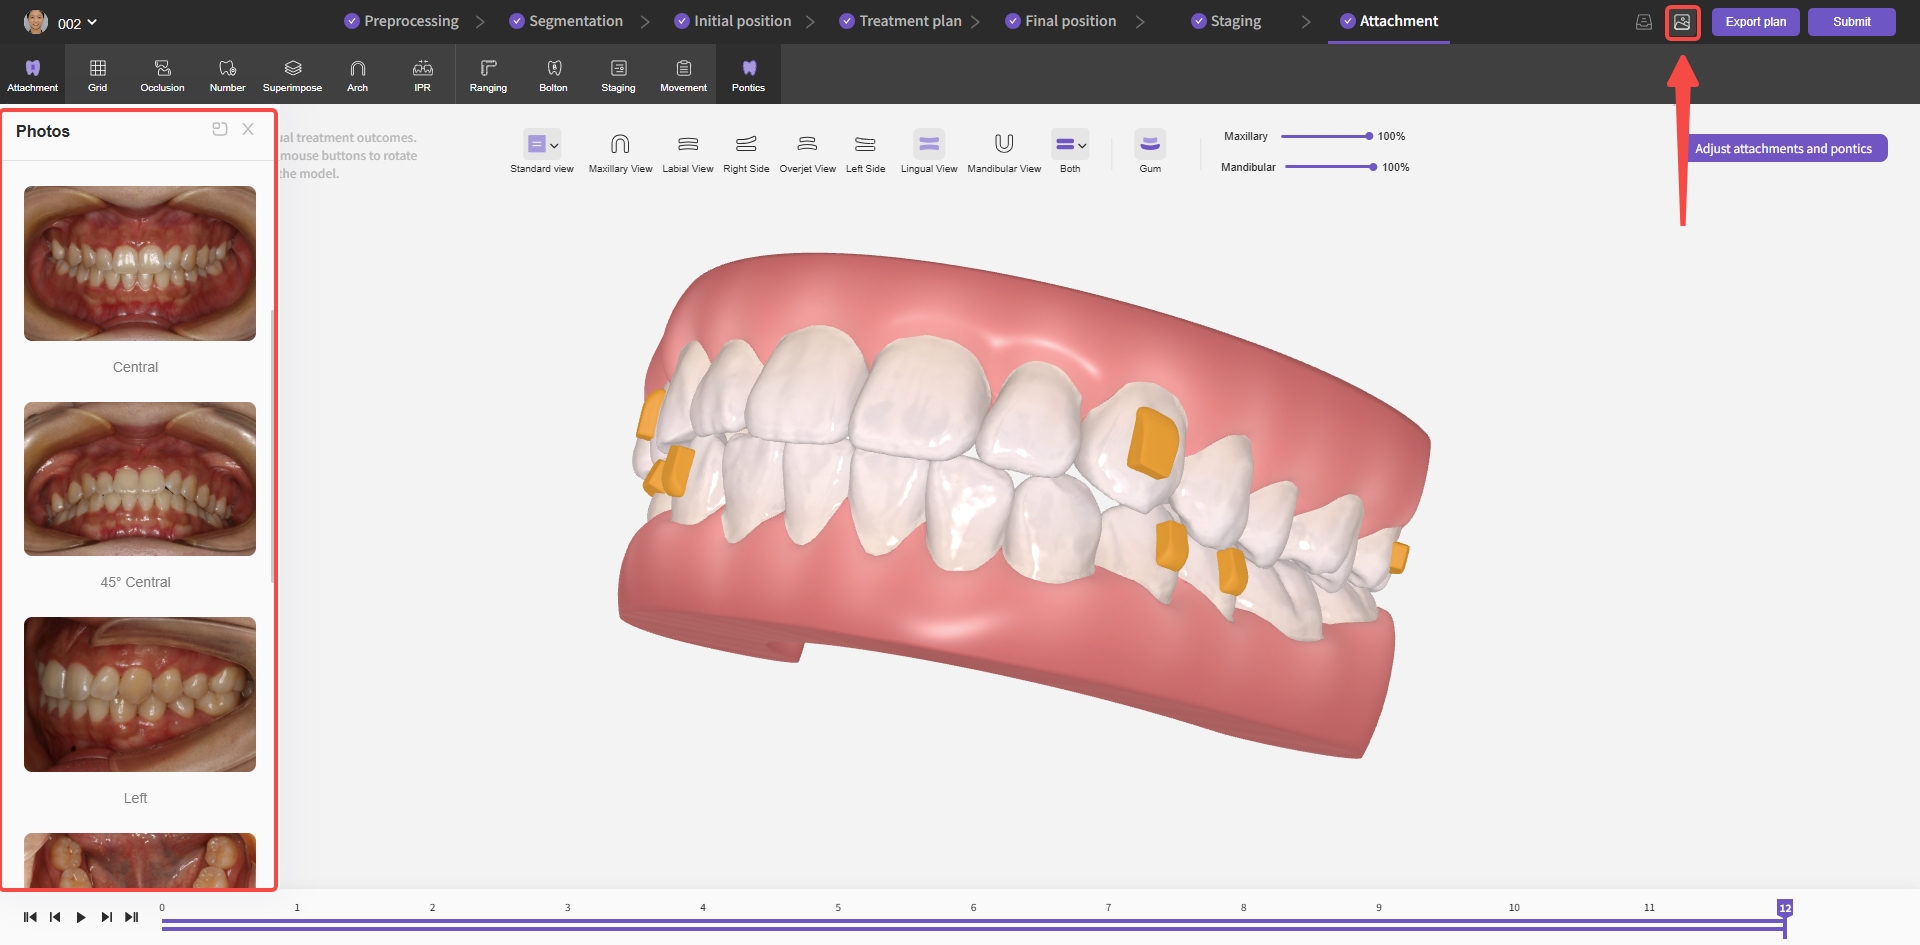
Photo Info Sidebar
Provides multiple export formats, supports generating shareable read-only links, and supports submitting plans to labs for further design and production.
Export Plan
1. Export 3D printing files: download printable jaw model and aligner files. Exported DSG files require LingOral production post-processing software; see the "Post-Processing" section for details.
Export - 3D Printing Files
2. Export operation report: users can download standardized diagnostic, production, and execution documents to synchronize information across stakeholders.
Export - Operation Report
3. Export staging video: users can download staging videos locally to demonstrate overall treatment progression to patients.
Export - Staging Video
4. Share plan link: Supports generating "Read-only" or "Editable" sharing links for treatment plans. The Read-only mode is ideal for presenting the complete treatment plan to doctors or patients, while the Editable mode allows doctors to make necessary adjustments, enabling seamless and efficient collaboration.
Export - Share Plan Link
Submit Plan: supports submitting to a lab for design or production (currently only available for test lab).
Learn more:
